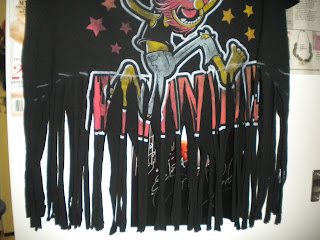
So I have been feeling under the weather but that’s no excuse… so I got my rest and came up with today’s post! This is a bit more hands on but I thought it was a fun idea to share with you all especially since its so easy. Basically its putting two of summers fun trends: the crop top & fringe. Like I said, its super easy and resourceful. So lets put some life back into that old t-shirt. Enjoy ♥
SUPPLIES: T-Shirt, Scissors, White Eyeliner or Pins
Step 1: Start by picking out a t-shirt. I don’t recommend using a good one on your first try in case you mess up. I usually just pick an old one or buy a cheap one. One that if I ruin I wont be mortified over.
Step 2: Start by putting it on and measuring 1) how high you want the fringe to go, 2) how wide you want the neck line (regular, v-neck, or off the shoulder). I went with off the shoulder in this case. I used a white eyeliner to mark it because it will come off when washed. For a white shirt you can use pins to mark it off or you can eyeball it.
Step 3: Cut the neckline and the bottom hem of the shirt. Remember that its easy to over cut so do it little by little. A tip for cutting the neckline is to have the lowest part be at the same level as the original neck line. You don’t really have to worry about the hem being neat because its going to be cut anyways.
Step 4: Begin cutting you fringe. I like to keep the side seems of the shirt so I cut the back and front edge into one piece. Just cut the fringe to your liking. Some higher up and some lower down the shirt, but don’t cut the length of the individual fringe just yet. The widths don’t have to be consistent.
Step 5: So after cutting you may notice that the fringe is flat (picture 1). To get the rolled fringe just tug each individual fringe from base to tip. You can also tug along the neckline to get a neater finish. VOILA! Your done.
Bonus Steps: You can trim the fringe to different various lengths. You can also add fringe to the sleeves. All I did for mine was cut the sleeves hems off and tugged on it to have it roll up
I REALLY HOPE YOU ALL ENJOYED THIS D.I.Y. TUTORIAL. IF YOU HAVE ANY QUESTIONS FEEL FREE TO ASK ♥


Thank You!!
ReplyDelete